Wednesday, January 20, 2021

More RV Bedroom Tear Down


We’ve gotten further on the bedroom tear down.  Literally, the walls and ceiling peel off with ease because they have been so waterlogged from the leaks in the ceiling.  Thankfully, the insulation doesn’t seem to be affected by the water.  We’re hoping to be able to reuse as much of that as we can. 
This is a view of the insulation under the wall and ceiling boards in the back bedroom.  
 

Wet stain above the ceiling and insulation.  

 As you can see, the boards just under the outside roofing is wet.  We are hoping that once we fix the leaks, we can dry this board out and seal it with a primer and then reuse the insulation, and then add in the ceiling and wall boards back on.  

Another order of business on our list is to take a wire brush to the steel framework.  It has rusted from all the water leakage and will need to be cleaned up.  We will then seal that to prevent it from rusting further.

Here you can see all those layers of waterlogged wall/ceiling board, insulation and framework.

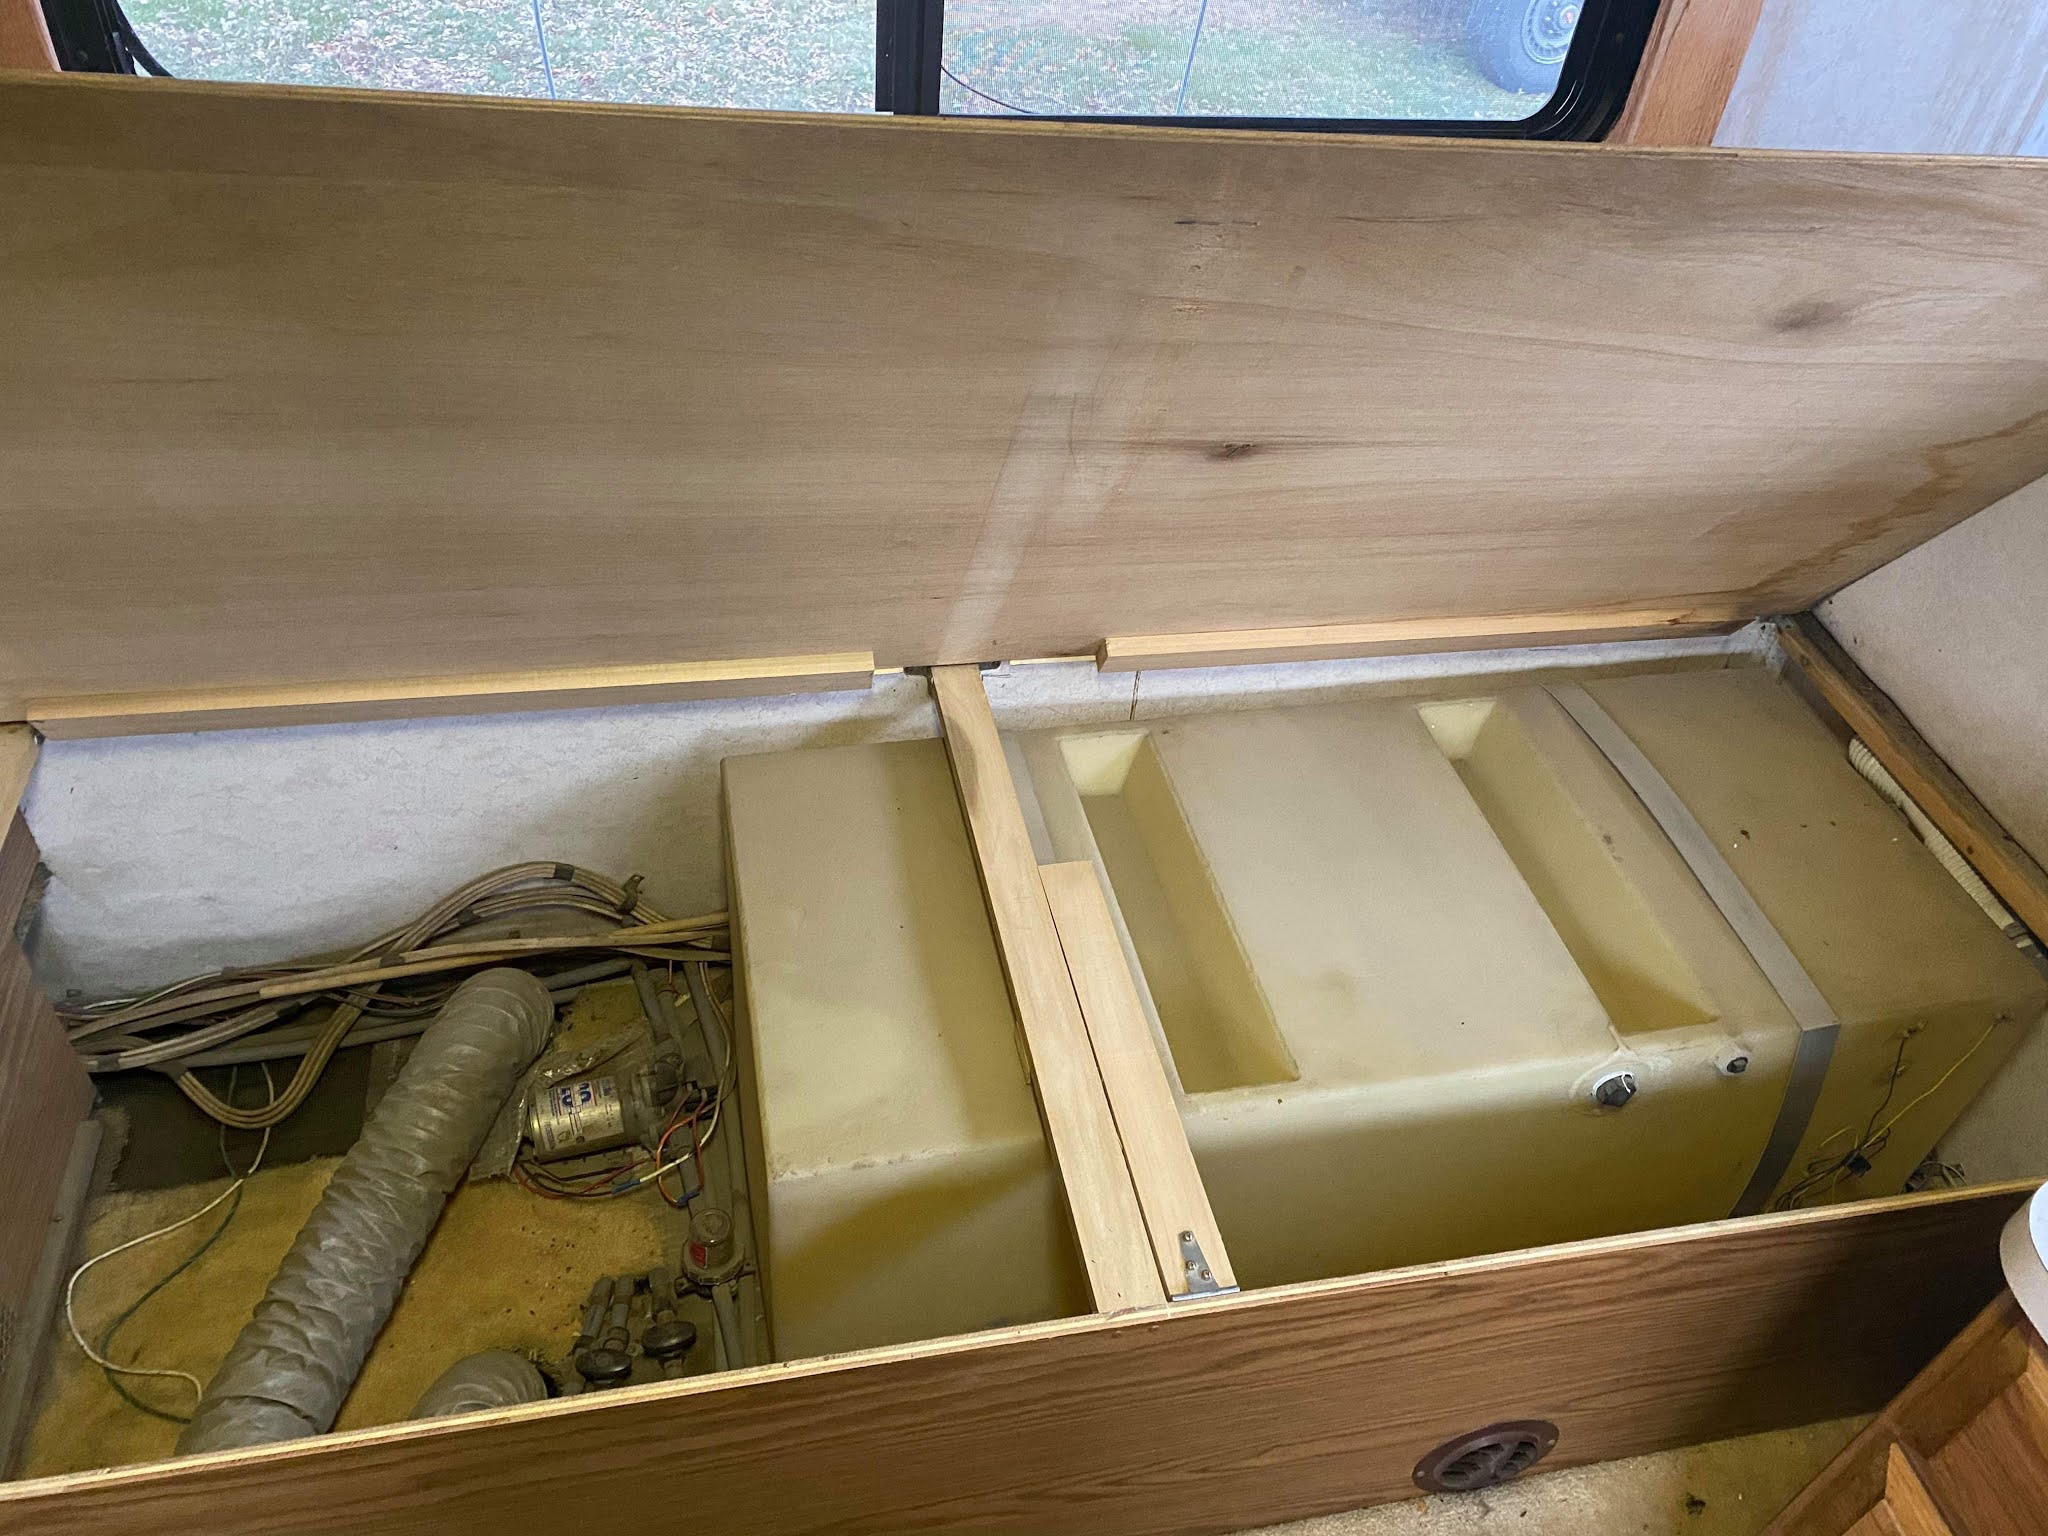
Wiring is starting to appear exposed throughout the bedroom since the ceilings and walls are coming down.  We did start to pull apart under the twin bed that had a false bottom to try to figure out why it is raised there.  We found all the main water and wiring coming into the RV under the twin bed drawers.
Under the driver’s side bed
The floor is raised under the bed.  The drawer is higher than you would expect as well.  After pulling all that out, we found that ll the main wiring is hidden here as well as the water pipes.  Fortunately, none of this looks like it has leaks or issues, yet.

There’s a plastic sheet under the bed sealing the underside of the RV from the bed.

The mice were definitely busy in this area, so we are going to have to try to figure out where they are getting into the vehicle and close up any holes.  The previous owners had steel wool just sitting under here, but he amount of mouse poo here is really gross!  Steel wool wasn’t doing it’s job of keeping the mice out.

The tape for the roof has been ordered, so the next big event for this RV is going to be applying the tape to the roof and getting it to stop leaking.  Then start the rebuilding of the ceilings and walls. Stay tuned for more gutting and hopefully redoing it

Tuesday, January 19, 2021

Road Trip Find!


We went on a road trip this last Saturday and ended up in Moscow, Idaho.  (We tried to go out to lunch in Pullman, Washington, but everything is closed, so ended up back in Idaho to hang out.)  We were driving downtown, and something shiny caught my husband’s eye.  Of course, he had to swing around and go through the alleys and get to it!  He even threatened to drive down the sidewalk to get there!  We found this cute little clothing boutique inside a very shiny Airstream!  Of course we had to check it out!


I did threaten to make him buy something since he was invading their place of business, but oh, well!  I promised to share their instagram account with you all!


The back bathroom has been made into a changing room


Just outside the changing room is a full length mirror


This is a cute idea to use an Airstream for a boutique.  I just hope that the inside wasn’t in great shape when they gutted it!  Original parts are sometimes hard to find, so hope they weren’t lost.   Also, this shop has some leaking issues (as most vintage Airstreams do). Hopefully they’ll figure out how to get that remedied as well.  My thought is that at least it’s one less Airstream that is junked completely and can be appreciated by others.  What do you think?  

Saturday, January 9, 2021

Bedroom Teardown

Frame from bedroom window
We have started to rip down some of the inside of the bedroom.  Now that I look back at the pictures, I do think that we are being a little on the tentative side, but at first glance we were overwhelmed!  Tearing it all down is making us realize how extensive the water damage is on the Airstream!

It’s hard to see this frame in the living area from the bedroom window.  Everything in this RV is beige - I’m pretty over it already.  Oh, and then gold mirrors too!  Can’t wait to get rid of it!  I’m not sure if we will be using these frames, they keep the blinds in place and from bouncing against the windows as you drive down the windows.  In the bedroom, they have coat hooks along each side, which is a nice use of space.  I guess we’ll see what we do with window covering before deciding if these frames go back up.


Before picture of the walls in bedroom

At first glance at all of the woodwork from the outside, it seemed like it was all salvageable, but a closer look at this front cabinet, we are realizing that it might not be that simple.  The inside of this cabinet is pretty damaged by water.
Front bed before
The ceiling panel was falling down on it’s own, so we just started pulling on it to get it down.  We haven’t gone into the insulation yet - it’s going to need some replacement as well, but we need to first fix the leaks in the roof.  It seems that fixing the inside will have to wait until we can get the leaking to stop.  All the outside seams need to get sealed.  Unfortunately, it’s winter, so this will have to be done in a shop.  

 
Back Bedroom Driver’s Side    

As we started peeling back, we realized that our first order of business is getting the leaks fixed.  This is pretty extensive damage and seems to be throughout the entire camper.  All the walls and ceilings will need to be replaced.  Mr. Right has found a tape that needs to go on all the seams to seal the leaks.  Apparently this is a usual problem with these rv’s.  

Closer look at the wall and ceiling damage in the bedroom

To ensure that there isn’t any further leaking, this is what Mr. Right came up with.  I know it’s necessary, but at this point, we do look a little trailer park around here.

Protection from rain and snow

Believe me, I’m pretty excited to at least get some warmer weather, so the leaks can be fixed or find a shop that we can use for a weekend!  I can only imagine what my neighbors think! 

Saturday, January 2, 2021

1992 Land Yacht Before Shots Inside


A view from just inside the door towards the front

The outside of our 1992 Land Yacht looks to be in pretty decent shape, but the inside is something to behold!  We aren’t really sure how much is going to have to replaced, but there is a lot of water damage as well as a lot of rodent damage too.  The previous owners had some cats in here too, so we will be doing a lot of cleaning and ripping out.  This is definitely the good, the bad and the ugly of this RV!

Kitchen, which is to the left of the door

Middle hallway on the way to the back bedroom

The hallway leading to the back bedroom has a full cedar lined closet and a shower.  

This is under the bed on the passenger size.  

Just behind the dinette is a full size refrigerator.  

As far as we can tell, it seems that the refrigerator is working.  It’s not even that dirty, but will need a cleaning.
Back passenger side twin bed

We took the twin mattresses out right away, so you don’t see them pictured here.  The roof over them has been leaking on them as well as the bugs and mice had their way with it.  Gross!!!

Bathroom on the right side in the middle

The door right next to the toilet closes to shut off the bathroom, or can be opened wide to make the entire hallway into a bathroom that includes the shower across the hall.  It’s pretty large.
This is the nightstand in the back between the twins.

A better view of the bathroom.  The cupboard space is pretty great.

This is where some of the leaking is occurring above the beds.

The original tv in the bedroom over one of the twins

A view to the back of the RV from the kitchen.

Original remote included!

Chairs behind driver and passenger seats.

These chairs are not attached and seem to be in pretty good shape.  I think once it gets warm, I should be able to power wash them and let them dry.  I may have to make slip covers, but it’s just one less item to completely replace.

Pantry between kitchen and bathroom on driver’s side

The pantry has had shelves added to make it better storage.  Other than cleaning, and possible painting, this area I would like to keep as is.  Everyone needs storage in an RV!


Another look at the toilet with that door opened up.  

There it is, a look at the entire RV on the inside before we get to work on it.  We will be working on this over the next year.  Hopefully less than a year, but you just never know! Stay tuned, for updates!